Skim coating is a popular technique used in the construction and renovation industry to achieve smooth and flawless wall surfaces. In this comprehensive guide, we will delve into the advantages and disadvantages of skim coating, explore its applications, provide tips for successful implementation, and discuss important factors to consider before undertaking a skim coating project.
Introduction to Skim Coating
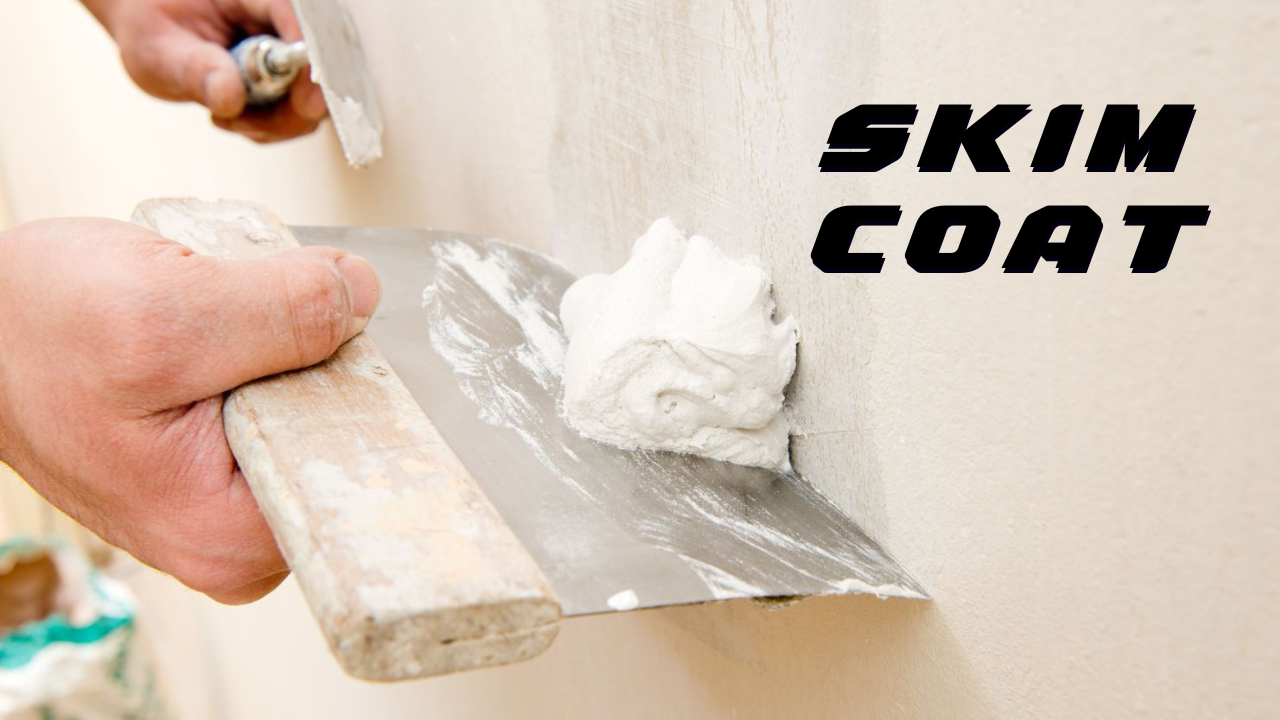
Skim coating, also known as plastering or troweling, involves applying a thin layer of joint compound or plaster over a wall surface to create a smooth and even finish. This technique is commonly used to repair damaged walls, hide imperfections, and prepare surfaces for painting or wallpapering. Skim coating requires precision and attention to detail to achieve professional results.
Advantages of Skim Coating
-
Smooth and Uniform Surface
Skim coating provides a seamless and uniform surface that enhances the aesthetic appeal of a room. By filling in cracks, dents, and imperfections, skim coating creates a flawless canvas for paint or wallpaper.
-
Correcting Surface Imperfections
One of the primary benefits of skim coating is its ability to correct surface imperfections such as uneven textures, bumps, and rough spots. By applying a thin layer of joint compound or plaster, contractors can achieve a level surface that is ready for finishing.
-
Improved Paint Adhesion
Skim coating improves paint adhesion by creating a smooth and porous surface that allows paint to adhere evenly. This ensures better coverage and durability of the paint finish, resulting in a professional-looking result.
-
Versatility in Finish Options
Skim coating offers versatility in finish options, allowing homeowners to choose from a variety of textures and effects. Whether you prefer a smooth, polished finish or a textured surface, skim coating can be customized to suit your aesthetic preferences.
-
Cost-Effectiveness Compared to Alternatives
While skim coating may require some investment in materials and labor, it is often more cost-effective than alternative methods such as replacing drywall or applying multiple layers of joint compound. By repairing and refinishing existing surfaces, skim coating can save both time and money in the long run.
Disadvantages of Skim Coating
-
Time-Consuming Process
Skim coating is a time-consuming process that requires careful preparation, application, and drying time. Depending on the size of the project and the condition of the walls, skim coating can take several days or even weeks to complete.
-
Skill and Experience Required
Achieving professional results with skim coating requires skill and experience. Proper application techniques, such as feathering and sanding, must be mastered to avoid visible seams or imperfections in the finished surface.
-
Potential Mess and Cleanup
Skim coating can create a mess, with joint compound or plaster dust accumulating on floors, furniture, and other surfaces. Proper precautions must be taken to protect surrounding areas and minimize cleanup efforts.
-
Limited Effectiveness on Certain Surfaces
While skim coating is suitable for most interior wall surfaces, it may not be effective on extremely damaged or uneven surfaces. In such cases, more extensive repairs or alternative methods may be necessary.
-
Not Suitable for Structural Repairs
Skim coating is primarily a cosmetic technique and is not suitable for structural repairs or major damage. It is important to assess the condition of the walls and address any underlying issues before skim coating.
Analyzing the Pros and Cons of Skim Coating: A Comprehensive Comparison
Advantages of Skim Coating |
Disadvantages of Skim Coating |
| Provides a smooth and uniform surface, ideal for painting or wallpapering. | Skim coating can be a time-consuming process, requiring careful preparation and application. |
| Corrects surface imperfections such as cracks, dents, and minor damage. | Skill and experience are required to achieve professional results, as improper application can lead to visible seams or imperfections. |
| Improves paint adhesion by creating a porous surface that allows paint to adhere evenly. | Skim coating can create a mess, with joint compound or plaster dust accumulating on floors and furniture. |
| Offers versatility in finish options, allowing for customization based on aesthetic preferences. | Skim coating may have limited effectiveness on extremely damaged or uneven surfaces, requiring additional preparation or alternative methods. |
| Cost-effective compared to alternatives such as replacing drywall or applying multiple layers of joint compound. | Skim coating is primarily a cosmetic technique and may not be suitable for addressing structural issues or major damage. |
This detailed table provides a comprehensive comparison of the advantages and disadvantages of skim coating, helping homeowners and contractors weigh the pros and cons before deciding whether to proceed with a skim coating project.
Factors to Consider Before Skim Coating
Before embarking on a skim coating project, there are several factors to consider:
- Condition of Existing Surface: Assess the condition of the walls to determine if skim coating is the best solution for addressing imperfections.
- Scope and Scale of Project: Consider the size and complexity of the project, as well as any additional repairs or preparation work required.
- Budget Considerations: Calculate the cost of materials, labor, and equipment needed for the project, and budget accordingly.
- Timeframe for Completion: Plan ahead and allocate sufficient time for each stage of the skim coating process, including drying and finishing.
- DIY vs. Hiring a Professional: Decide whether to tackle the project yourself or hire a professional contractor with experience in skim coating.
Skim Coating vs. Alternatives
Skim Coating vs. Spackling
While spackling is suitable for minor repairs and patching, skim coating offers a more comprehensive solution for achieving smooth and uniform surfaces over larger areas.
Skim Coating vs. Drywall Replacement
Instead of replacing damaged drywall, skim coating can be used to repair and refinish existing walls, saving time, money, and resources.
Skim Coating vs. Texture Painting
While texture painting can add visual interest and depth to walls, skim coating provides a smoother and more refined finish that is ideal for modern and contemporary interiors.
Tips for Successful Skim Coating
- Proper Surface Preparation: Clean and prime the walls before applying skim coat to ensure optimal adhesion and finish.
- Selection of Materials and Tools: Choose high-quality joint compound or plaster and use professional-grade tools for best results.
- Application Techniques: Apply skim coat in thin, even layers using a trowel or putty knife, and feather the edges to blend seamlessly with the surrounding surface.
- Drying and Sanding Process: Allow sufficient drying time between coats and sand the surface lightly between each layer to achieve a smooth finish.
- Quality Assurance and Touch-Ups: Inspect the finished surface for any imperfections or blemishes, and make any necessary touch-ups or corrections before painting or finishing.
Case Studies and Examples
Case Study: Residential Skim Coating Project
Background: A homeowner, Mr. Smith, recently purchased an older home with walls that showed signs of wear and tear. The walls had minor cracks, dents, and uneven textures due to years of use and neglect. Mr. Smith wanted to renovate the interior of his home to create a fresh and modern look, starting with the walls.
Objective: The objective of the project was to repair and refinish the walls to achieve a smooth and uniform surface that would serve as a blank canvas for painting and decorating.
Implementation:
- Assessment: A thorough assessment of the walls was conducted to identify areas that required repair and preparation for skim coating.
- Surface Preparation: The walls were cleaned and primed to ensure optimal adhesion of the skim coat. Any loose paint or debris was removed, and minor repairs were made to fill in cracks and dents.
- Skim Coating: A professional contractor was hired to apply the skim coat using high-quality joint compound. The skim coat was applied in thin, even layers using a trowel, and the edges were feathered to blend seamlessly with the surrounding surface.
- Drying and Sanding: Each layer of skim coat was allowed to dry thoroughly before sanding lightly to achieve a smooth finish. Multiple coats were applied as needed to achieve the desired level of smoothness.
- Quality Assurance: The finished surface was inspected for any imperfections or blemishes, and touch-ups were made as necessary to ensure a flawless result.
Results:
The skim coating project transformed the walls of Mr. Smith’s home, providing a smooth and uniform surface that enhanced the overall appearance of the interior space. The repaired and refinished walls served as an ideal backdrop for painting and decorating, allowing Mr. Smith to achieve the modern look he desired.
Conclusion:
The residential skim coating project demonstrated the effectiveness of this technique in repairing and refinishing walls to achieve professional results. By addressing surface imperfections and creating a smooth and uniform finish, skim coating can significantly enhance the aesthetic appeal and value of a home.
This case study highlights the importance of proper surface preparation, skilled application techniques, and quality assurance in achieving successful skim coating results. Whether renovating an older home or updating a modern space, skim coating offers a versatile and cost-effective solution for achieving smooth and flawless wall surfaces.
FAQS:
- What is skim coating, and how does it work?
- Skim coating is a technique used to create a smooth and even surface on walls by applying a thin layer of joint compound or plaster. It involves filling in imperfections and smoothing out rough textures to achieve a uniform finish.
- Is skim coating suitable for all types of walls?
- Skim coating is most commonly used on drywall, but it can also be applied to plaster, concrete, and other wall surfaces. However, the condition of the existing surface and the extent of damage will determine the effectiveness of skim coating.
- How long does skim coating take to dry?
- The drying time for skim coating can vary depending on factors such as temperature, humidity, and the type of joint compound used. In general, skim coat layers should be allowed to dry for at least 24 hours before sanding or applying additional coats.
- Can I skim coat over existing paint?
- Skim coating over existing paint is possible, but it requires thorough surface preparation to ensure proper adhesion. The paint should be cleaned, sanded, and primed before applying the skim coat to promote adhesion and prevent peeling.
- Is skim coating a DIY-friendly project?
- Skim coating can be challenging for beginners and may require some skill and practice to achieve professional results. While DIY enthusiasts can attempt skim coating with proper preparation and research, hiring a professional contractor is recommended for larger or more complex projects.
- Does skim coating require any special tools or equipment?
- Skim coating requires basic tools such as a trowel, putty knife, sandpaper, and joint compound. Specialized tools such as a hawk or mud pan may also be used for mixing and applying the joint compound.
- How many coats of skim coat are needed for a smooth finish?
- The number of skim coat layers needed depends on the condition of the walls and the desired level of smoothness. In most cases, two or three thin coats of skim coat are applied, with each layer allowed to dry before sanding and applying the next coat.
- Can skim coating be used to repair textured walls?
- Skim coating can be used to smooth out textured walls, but the texture may still be visible to some extent depending on the depth and type of texture. For heavily textured walls, additional preparation or alternative techniques may be needed to achieve a smooth finish.
- How long does a skim coating project typically take to complete?
- The duration of a skim coating project depends on factors such as the size of the area being coated, the number of coats applied, and the drying time between coats. Smaller projects may be completed in a few days, while larger projects may take several days or even weeks to finish.
- Can skim coating be used to repair water damage on walls?
- Skim coating can help repair minor water damage on walls by filling in cracks, covering stains, and restoring the surface to a smooth finish. However, it is important to address any underlying moisture issues before skim coating to prevent future damage.
- Does skim coating require any special maintenance after completion?
- Skim-coated walls do not require any special maintenance beyond regular cleaning and upkeep. However, it is important to avoid harsh cleaning agents or abrasive materials that could damage the skim coat surface.
- Is skim coating environmentally friendly?
- Skim coating with eco-friendly joint compounds and plasters can be considered environmentally friendly, as these products are typically low in volatile organic compounds (VOCs) and safer for indoor air quality. However, it is important to check product labels and choose environmentally friendly options when possible.
Conclusion
In conclusion, skim coating offers a versatile and cost-effective solution for achieving smooth and flawless wall surfaces in both residential and commercial settings. While it requires skill and patience to master, the benefits of skim coating far outweigh the drawbacks for many homeowners and contractors. By understanding the pros and cons of skim coating and following best practices for application and finishing, you can achieve professional results that enhance the beauty and value of your space.
If you’re considering skim coating for your next renovation or remodeling project, be sure to consult with letdecor or a qualified contractor or professional for expert advice and assistance.